Rain gutter installation is a critical home improvement project that protects your property from water damage. At Haileys Pro Services, we understand the importance of proper gutter systems for maintaining your home’s structural integrity.
This step-by-step guide will walk you through the process of installing rain gutters, from preparation to final sealing. Whether you’re a DIY enthusiast or considering professional help, this information will help you make informed decisions about your gutter installation project.
How to Prepare for Gutter Installation
Measure Your Home’s Perimeter
The first step in gutter installation preparation involves accurate measurements. Use a tape measure to determine the total linear feet of gutters you’ll need. Include corners and downspout locations in your calculations. Add 10% to your total measurement to account for waste and potential errors during installation. Remember, a downspout is required for every 20 feet of gutter to ensure proper water drainage.
Calculate Materials and Costs
With your measurements in hand, you can now calculate the necessary materials. This includes gutters, downspouts, elbows, brackets, and fasteners. A typical gutter system costs between $3 to $30 per linear foot (depending on the material chosen). Vinyl gutters offer a budget-friendly option, while copper gutters provide superior durability at a higher price point.
Gather Essential Tools
Before you start, collect all the necessary tools. You’ll need:
- Ladder
- Drill
- Hacksaw
- Level
- Chalk line
- Screwdrivers
Don’t forget safety equipment like gloves and safety glasses. If you’re uncomfortable working at heights, consider renting scaffolding for added security.
Select the Right Gutter Material
Your choice of gutter material impacts the longevity and effectiveness of your system. Popular options include:
- Aluminum: Lightweight and rust-resistant
- Vinyl: Cost-effective but may become brittle in cold climates
- Steel: Durable in harsh weather conditions

When choosing your gutter style, consider your home’s aesthetics and local weather patterns. K-style gutters hold more water, while half-round gutters offer a classic look (but may be less efficient in heavy rainfall areas).
Consider Professional Assistance
If you feel overwhelmed by any aspect of the preparation process, don’t hesitate to seek expert advice. Professional services can offer valuable insights and assistance to ensure your gutter installation project starts on solid footing.
As you complete these preparation steps, you’ll be well-equipped to move on to the actual installation process. The next section will guide you through the step-by-step gutter installation procedure, building on the groundwork you’ve laid during this preparation phase.
How to Install Rain Gutters
Mark the Slope and Placement
Start at the high point of your gutter run (typically the point farthest from the downspout). Discover essential tips on calculating and installing the correct gutter slope for effective home maintenance. This slope ensures proper water drainage. For gutter runs longer than 40 feet, consider pitching from the middle to downspouts at both ends.
Install Brackets and Hangers
Gutter hangers should be no more than three feet apart. This is dependent on many factors, including your location, climate and specific gutters. Use a level to ensure each bracket is perfectly straight. In areas with heavy snowfall or rainfall, space brackets closer together for added support. Always use stainless steel screws to prevent rust and ensure longevity.
Cut and Assemble Gutter Sections
Measure and cut your gutter sections to fit between corners and downspout locations. (Always wear safety glasses and work gloves during this process.) For corners, cut a 45-degree angle using a power miter saw for precision. Join sections using gutter sealant and rivets to create a watertight seal.
Attach Downspouts and Elbows
Install downspout outlets at predetermined locations. Secure them to the gutter with rivets or screws. Attach elbows to direct water from the gutter to the ground. Make sure your downspouts extend at least 4 feet away from your home’s foundation to prevent water damage.
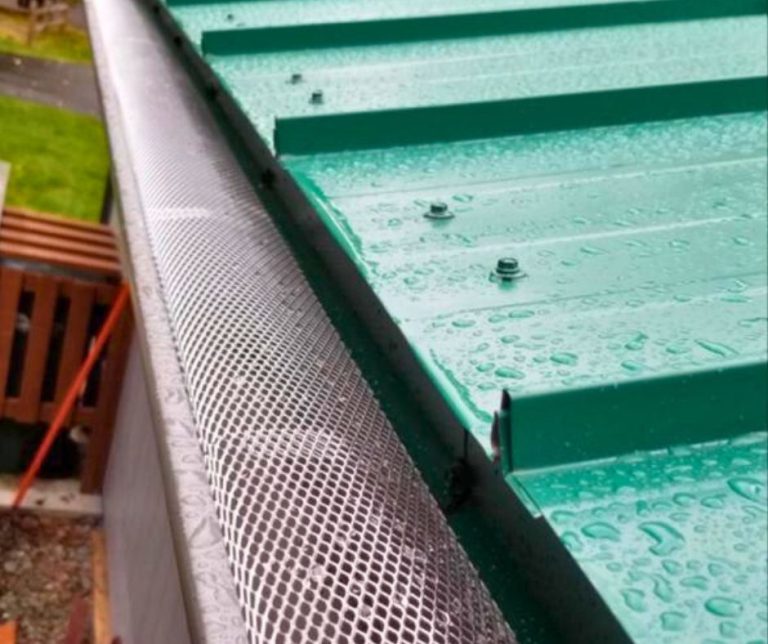
Seal Joints and Connections
Apply a high-quality silicone sealant to all joints, seams, and end caps. This step prevents leaks. Don’t skimp on sealant – a properly sealed gutter system can last for years without issues. (Try to apply a generous amount of sealant to ensure complete coverage.)

While DIY installation is possible, it’s not for everyone. If you’re unsure about any step in the process, consult with professionals. Expert gutter installation services can ensure your home is protected from water damage for years to come. Now that you understand the installation process, let’s explore common mistakes to avoid during gutter installation.
Gutter Installation Pitfalls to Sidestep
Incorrect Slope Calculation
The slope of your gutters determines their effectiveness. A slope that’s too steep or too shallow can cause water pooling or overflow. Typically, a slope between 1/8 inch to 1/4 inch per 10 feet of gutter length is best for proper drainage. Use a level and string to mark your slope accurately before installation. (For longer runs, a laser level can provide better precision.)
Material Incompatibility
Using mismatched materials can lead to corrosion and system failure. Aluminum gutters should not pair with copper downspouts due to galvanic corrosion. Stick to materials that work well together. If you’re unsure, ask a professional for advice.
Improper Hanger Spacing
Incorrect spacing of gutter hangers often results in sagging gutters. The general rule is to place hangers every 2 feet, but this can vary based on your local climate. Areas with heavy snow or rainfall might require closer spacing. Always use high-quality hangers rated for your gutter size and expected load.
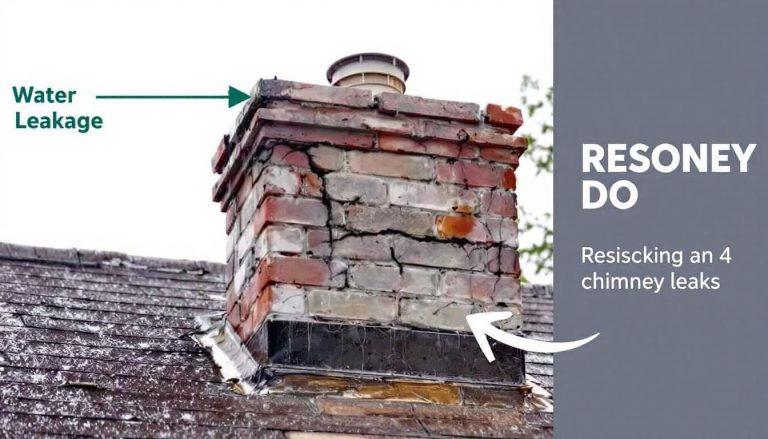
Inadequate Joint Sealing
Leaks often occur due to poor sealing of joints. Use a high-quality gutter sealant on all seams, corners, and end caps. Apply sealant generously to cover all potential gaps. (A little extra time spent sealing can prevent costly water damage in the future.)
Disregarding Local Weather
Your gutter system must withstand your local climate. Rainfall intensity design plays a vital role in mitigating the effects of extreme rainfall and is involved in the construction of any rainwater system. Areas with heavy rainfall might need wider gutters or additional downspouts. Regions with frequent freezing and thawing should consider gutter heating systems to prevent ice dams. Factor in the worst-case weather scenarios when planning your gutter installation.

Final Thoughts
Rain gutter installation protects your home from water damage. You must consider local climate, roof design, and drainage patterns when selecting the optimal gutter system for your property. DIY installation requires skills and tools, but professional help might be necessary for complex situations.

Professional gutter installation services provide expert knowledge and efficient installation. Experienced technicians understand gutter system nuances and ensure installations meet local building codes and weather requirements. Professional installation often includes warranties and ongoing maintenance support (which further protects your investment).
Haileys Pro Services offers quality rain gutter installation for long-term home protection. A well-installed gutter system protects your home from water damage and enhances its overall value and curb appeal. You set the foundation for a drier, safer home environment for years to come with proper gutter installation.