At Haileys Pro Services, we know that the installation of standing seam metal roofs requires precision and expertise. This guide will walk you through the essential steps to ensure a successful project.
From preparation to maintenance, we’ll cover everything you need to know about this durable and attractive roofing option. Whether you’re a DIY enthusiast or a professional contractor, our comprehensive guide will help you tackle this challenging but rewarding task.
How to Prepare for Standing Seam Metal Roof Installation
Assess Your Existing Roof
The first step in preparation requires a thorough assessment of your current roof structure. This involves an inspection of the decking, trusses, and overall structural integrity. According to the National Roofing Contractors Association, 40% of all building-related complications are attributed to water leaks.

Check for signs of water damage, rot, or sagging in the roof deck. Address these issues before you proceed with the new installation. If you’re unsure about the condition of your roof, consult with a professional roofing inspector.
Gather Essential Tools and Materials
The right tools and materials ensure a smooth installation process. Here’s what you’ll need:
- Metal panels and trim pieces
- Underlayment (synthetic or felt)
- Fasteners (screws and clips)
- Sealant and caulk
- Tin snips and metal shears
- Power drill with metal-cutting bits
- Tape measure and chalk line
- Safety equipment (more on this in the next section)
For the metal panels, select a high-quality material like galvanized steel or aluminum. These materials offer excellent durability and longevity. Metal roofs can last 40 to 70 years, which makes material selection a top priority.
Prioritize Safety: Equipment and Precautions
Safety should top your list of priorities when you prepare for a roofing project. The Occupational Safety and Health Administration (OSHA) reports that falls lead as the cause of death in construction (accounting for 33.5% of fatalities in the industry).
Essential safety equipment includes:
- Non-slip safety boots
- Hard hat
- Safety glasses
- Cut-resistant gloves
- Fall protection system (harness and anchors)
Additionally, ensure you have a sturdy ladder and scaffolding if necessary. Always work with a partner and avoid work in wet or windy conditions.
Plan Your Installation Strategy
Before you start the actual installation, create a detailed plan. This plan should include:
- Measurements of your roof (length, width, and pitch)
- Panel layout design
- Locations for vents, chimneys, and other roof penetrations
- Timeline for the project (factoring in weather conditions)
A well-thought-out plan will help you avoid costly mistakes and ensure a more efficient installation process.
Obtain Necessary Permits
Check with your local building department about required permits for your roofing project. Many jurisdictions require permits for roof replacements or significant repairs. Failure to obtain the proper permits can result in fines or complications when you sell your property.
Thorough preparation sets the stage for a successful standing seam metal roof installation. The next chapter will guide you through the step-by-step installation process, where you’ll put all this preparation to good use.
How to Install a Standing Seam Metal Roof: A Step-by-Step Guide
Prepare the Foundation
Start the installation process by applying a high-quality synthetic underlayment. This layer shields your roof deck from moisture and creates a smooth base for the metal panels. Unroll the underlayment horizontally, beginning at the eaves and progressing towards the ridge. Overlap each row by at least 6 inches and fasten with cap nails every 12 inches.

For areas susceptible to ice dams, add an ice and water shield along the eaves. Extend this protective layer at least 24 inches inside the exterior wall line of the building to prevent water infiltration from ice accumulation.
Secure the Perimeter
Install the eave and rake trim next. These components guide water away from the roof edges and provide a polished appearance. Start with the eave trim, aligning it with the roof edge and securing it with screws every 12 to 16 inches. For the rake trim, begin at the gable end’s bottom and work upwards, overlapping pieces by at least 3 inches.
Install Metal Panels
The main phase of the installation involves laying the metal panels. Begin at one end of the roof, ensuring the first panel is square with the eave. Use a chalk line to mark guidelines for straight installation. Attach the panels with clips and fasteners, adhering to the manufacturer’s specifications for spacing.
As you progress, check for proper alignment and make adjustments as needed. Leave a 1/4-inch gap between panels to allow for expansion and contraction (this step is vital to prevent buckling or oil-canning of the metal).
Add Finishing Touches
Complete the installation by adding ridge caps and flashings. These elements seal the roof’s peak and any penetrations such as chimneys or vents. For the ridge cap, start at one end of the roof and progress to the other, overlapping pieces by at least 6 inches. Apply butyl tape or sealant between overlaps for enhanced water protection.
For flashings around penetrations, cut and shape the metal to fit snugly around the object. Apply a high-quality sealant to ensure a watertight seal. Pay extra attention to these areas, as they’re common sources of leaks if not properly installed.
Throughout the installation, regularly inspect your work and remove any metal shavings or debris. These can scratch the roof’s surface or lead to rust spots if left behind.
While this guide provides a general overview, it’s important to note that every roof is unique. Factors such as roof pitch, climate, and local building codes can influence the installation process. When in doubt, consult with a professional or refer to manufacturer guidelines for specific instructions.
The next chapter will focus on the essential maintenance and care practices to ensure your newly installed standing seam metal roof remains in top condition for years to come.
How to Maintain Your Standing Seam Metal Roof
Conduct Regular Inspections
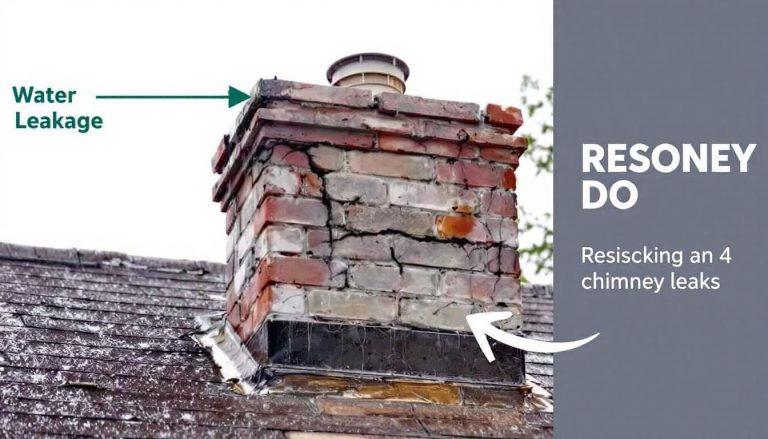
Regular inspections are crucial for maintaining your standing seam metal roof. This comprehensive guide provides valuable insights for anyone looking to extend the lifespan of their metal roof. During these inspections, look for loose or damaged panels, deteriorating sealants, and signs of corrosion. Focus on areas around chimneys, vents, and skylights, as these are common spots for leaks to develop.

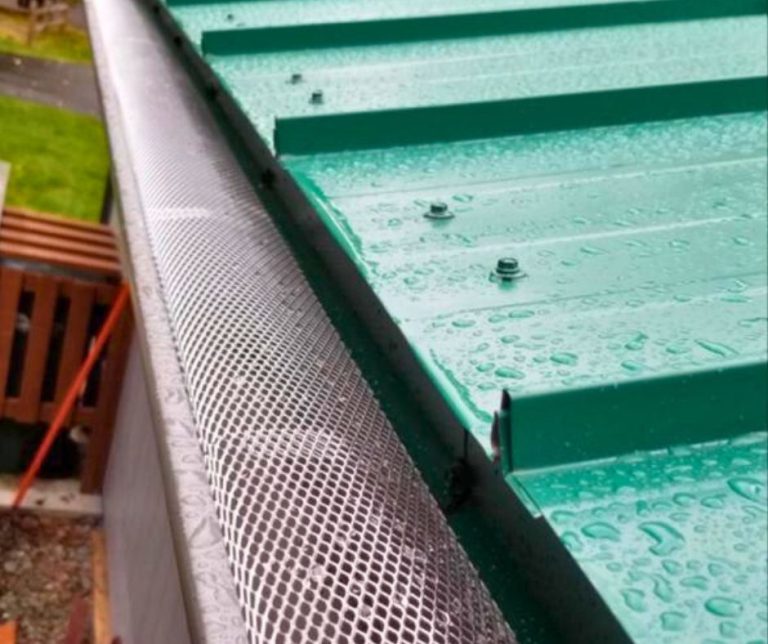
The National Roofing Contractors Association recommends checking for debris accumulation, particularly in valleys and gutters. Remove leaves, branches, and other materials that can trap moisture and accelerate corrosion. Use a soft-bristled brush or a leaf blower to clear debris without scratching the metal surface.
Address Minor Issues Quickly
When you spot minor problems during inspections, fix them immediately to prevent escalation. If you notice a small area of rust, clean it with a wire brush and apply a rust-inhibiting primer followed by a paint that matches your roof color. For loose fasteners, tighten them carefully (avoid over-tightening to prevent panel damage).
Sealant deterioration is another common issue. Replace any cracked or missing sealant with a high-quality, UV-resistant urethane sealant designed for metal roofs. Always clean and dry the area thoroughly before applying new sealant to ensure proper adhesion.
Manage Snow and Ice Buildup
In regions with heavy snowfall, snow and ice management is important for standing seam metal roofs. While these roofs shed snow, excessive accumulation can lead to ice dams and potential leaks. Use a roof rake with a plastic edge to remove snow from the roof’s edge, creating a path for melting snow to drain.
Avoid using salt or chemical snow-melt products on your metal roof, as these can corrode the surface. Consider installing heat cables along the roof’s edge to prevent ice dam formation. These cables create channels for melting snow to drain, reducing the risk of water backing up under the panels.
Hire Professional Help When Needed
Walking on a metal roof can be dangerous and may damage the panels. For complex maintenance tasks or if you’re uncomfortable working at heights, hire a professional roofing contractor. They have the expertise and equipment to safely perform maintenance and repairs on your standing seam metal roof.
If you’re in need of professional roofing services (including maintenance and repairs), consider Hailey’s Pro Services. Our expert technicians specialize in roof installation and maintenance, ensuring your standing seam metal roof remains in top condition for years to come.
Final Thoughts
The installation of standing seam metal roofs demands meticulous planning and precise execution. These roofs offer exceptional durability, often lasting 40 to 70 years, and provide superior weather resistance and energy efficiency. Their sleek, modern aesthetic enhances property curb appeal, making them an attractive option for homeowners and businesses.

Professional installation ensures that your roof performs optimally and maximizes its lifespan. At Haileys Pro Services, we specialize in roof installation and maintenance, offering the expertise needed for precise standing seam metal roof installation. Regular maintenance preserves the integrity of your roof and helps it withstand the test of time.
Quality materials, expert installation, and consistent upkeep allow you to enjoy the benefits of a standing seam metal roof for decades. This durable and efficient roofing solution not only protects your property but also adds significant value to your home or business. Professional help ensures your roof remains in top condition for years to come.